International Space Station Tracker
I had an old Raspberry Pi 3b not doing much of anything so I went looking for a project to give it a purpose. Turns out there are a couple of free APIs that provide the current location of the International Space Station as well as who is currently in space. The software for this project is written in Python but you don’t need to know how to program in any language to get this running. I’ve included instructions on my Github repository and the project also has a theme file to change certain aspects of the display. The 3D files are available on Makerworld.
What I Used
- Raspberry Pi 3b
- 3.5" LCD from Waveshare
- Toggle switch
- Bambu Lab PLA-CF filament
- 3mm aluminum plate
The Display
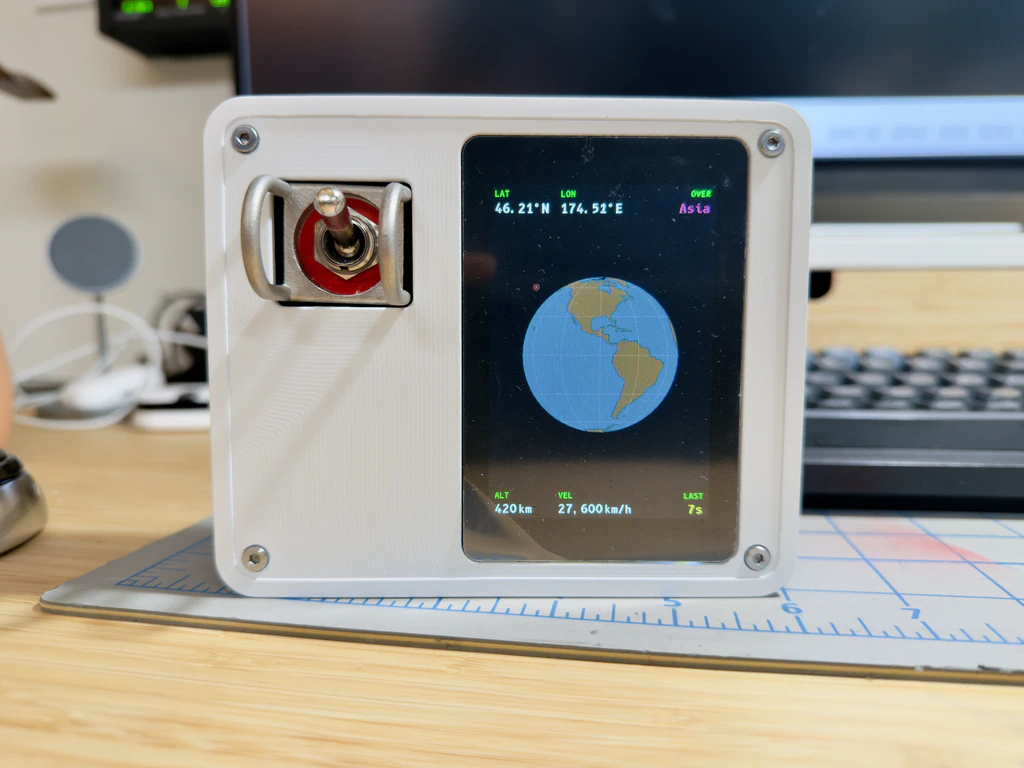
The Waveshare display is a hat for the Raspberry Pi. It uses pogo pins to contact the GPIO when you screw the two devices together. It couldn’t be easier on the hardware front. The only downside of this display is the SPI interface. I just can’t get a high enough frame rate for the globe to rotate smoothly, but it’s not mission critical, pun intended.
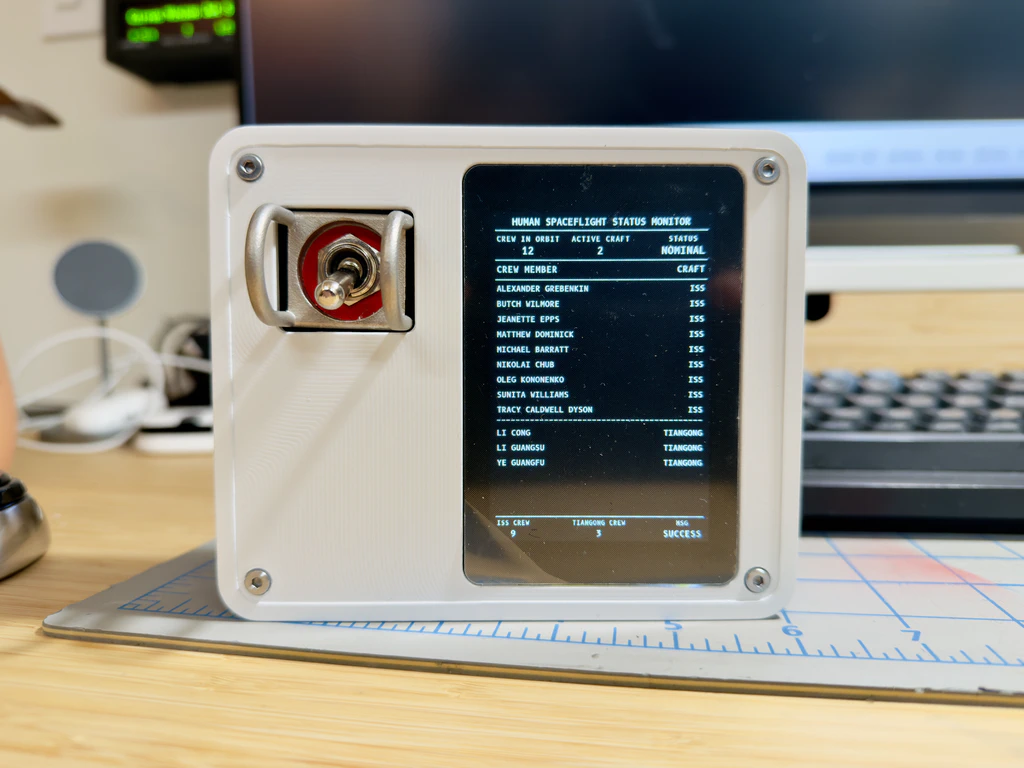
The toggle switch is mostly to add whimsy. I ordered a batch of these aluminum cast toggle guards a while back and decided this would be a perfect use for one. Having added a toggle switch, it seemed silly not to give it a function so, if you toggle the switch to the down position, the display switches to showing data about the humans currently in space. This data is provided from one of the free APIs that the project uses.
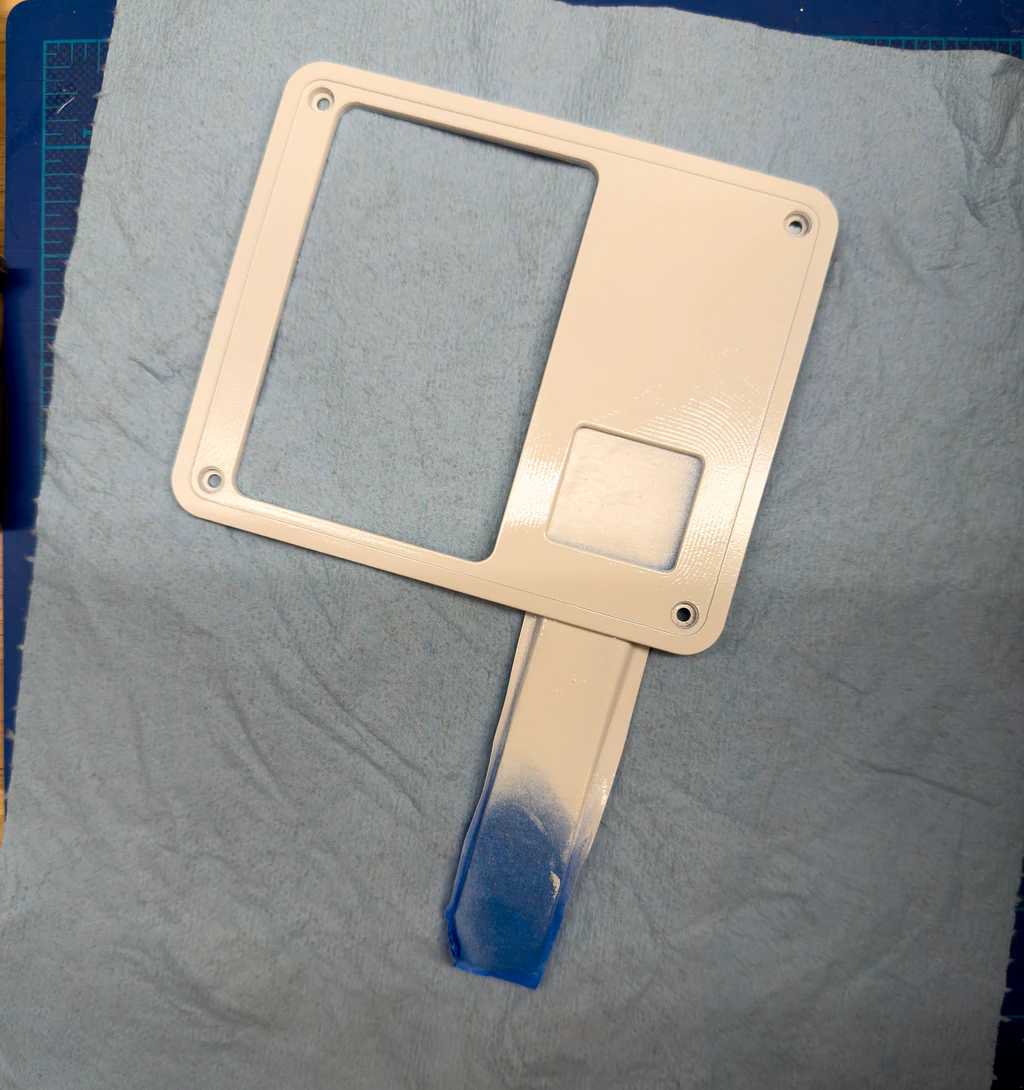
Faceplate
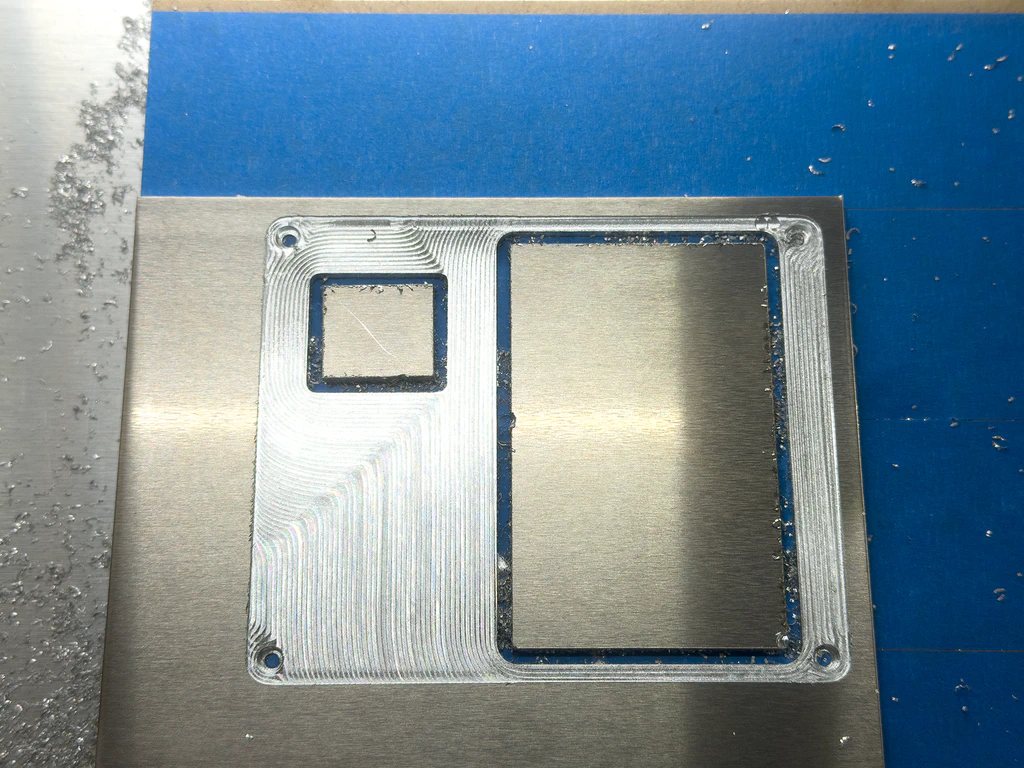
I made a last minute decision to CNC the faceplate out of aluminum. It just felt like the right move given the switch guard is aluminum and I had the material from a previous project. I wouldn’t say the CNC I have is great at aluminum but, with a light enough cut, it can be done. This faceplate represents over an hour of machine time, which is laughable for any real deal CNC machine doing this type of work. My CNC is in my home office so it’s the best I got.
Painting
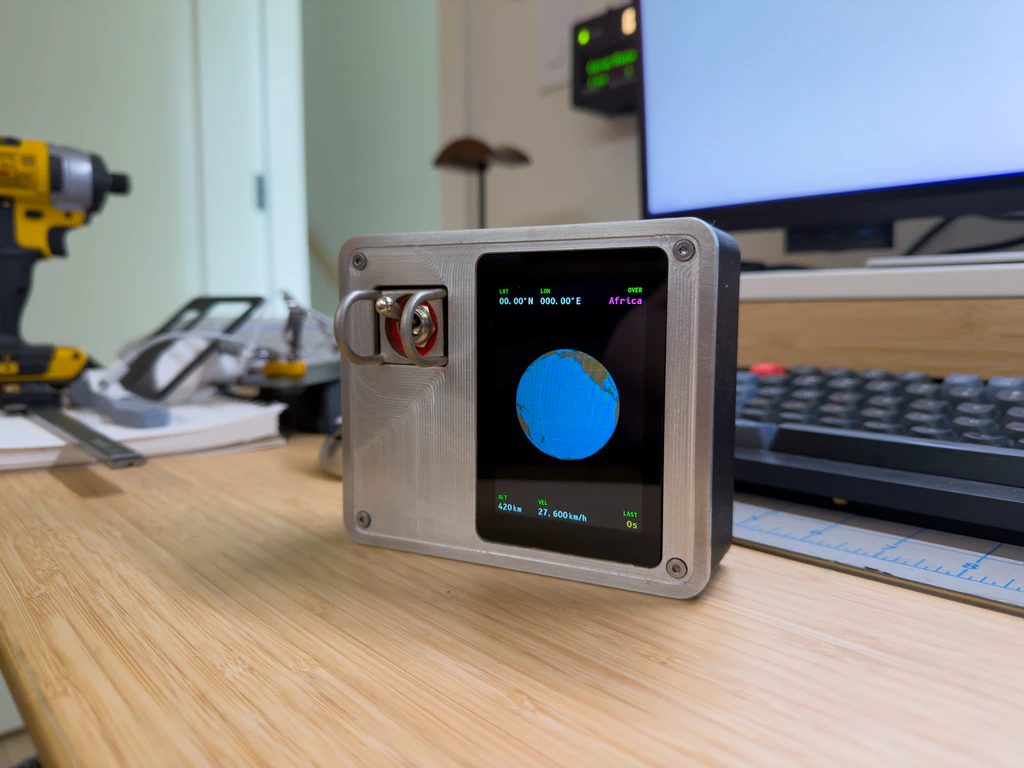
I initially wanted to keep this in raw aluminum, after all, why put in the effort of making it out of metal if I was just gonna paint it. But the raw aluminum just didn’t feel finished enough. It needed the paint, plus, I planned on adding a decal to it and the white paint would make that decal pop more.
One thing that I tried on this project was to use my 3D printer’s heated chamber to speed up the curing process of the paint. I gave the paint an initial 24 hour cure but then, for the final part of the cure, I would set it inside the printer’s chamber and set it to do a filament dry cycle for twelve hours. I’m sure this is a bad idea in one way or another but AI told me I was a genius for this so I’m gonna listen to the AI.

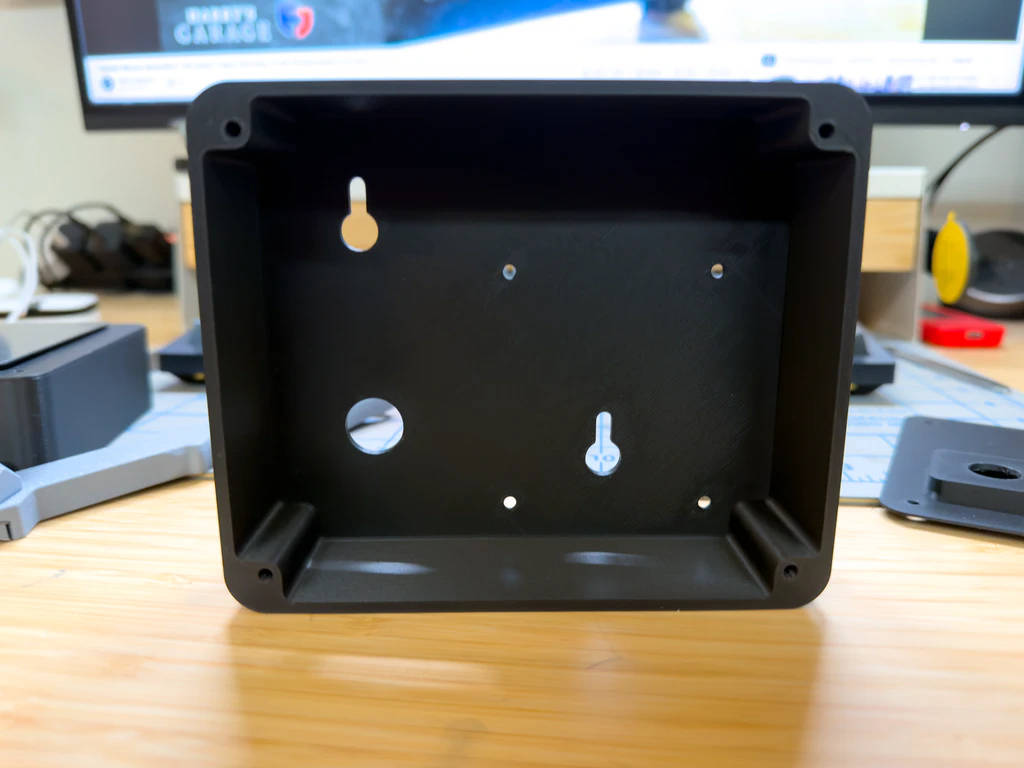
Housing
The housing is comprised of two printed pieces. The main housing is the structure that everything is screwed to, the faceplate, the Raspberry Pi via brass standoffs, as well as some mounting provisions to wall mount the whole thing.
I needed a way to mount the toggle switch and also control the depth of the switch and switch guard so that it sat where I wanted once the faceplate was on. I don’t have a good shot of the switch plate but you can see it off to the right in this photo. I decided to make that a separate print so that I can iterate on it without having to reprint the entire housing since that would be a lot of material and time. Glad I did because I ended up reprinting that part multiple times, as you do with things like this.
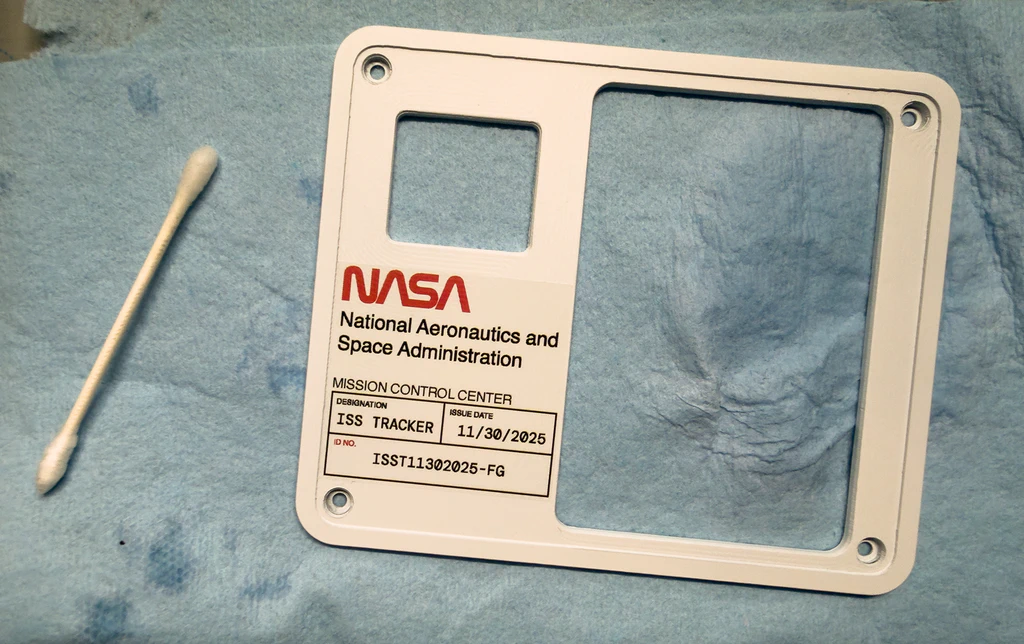
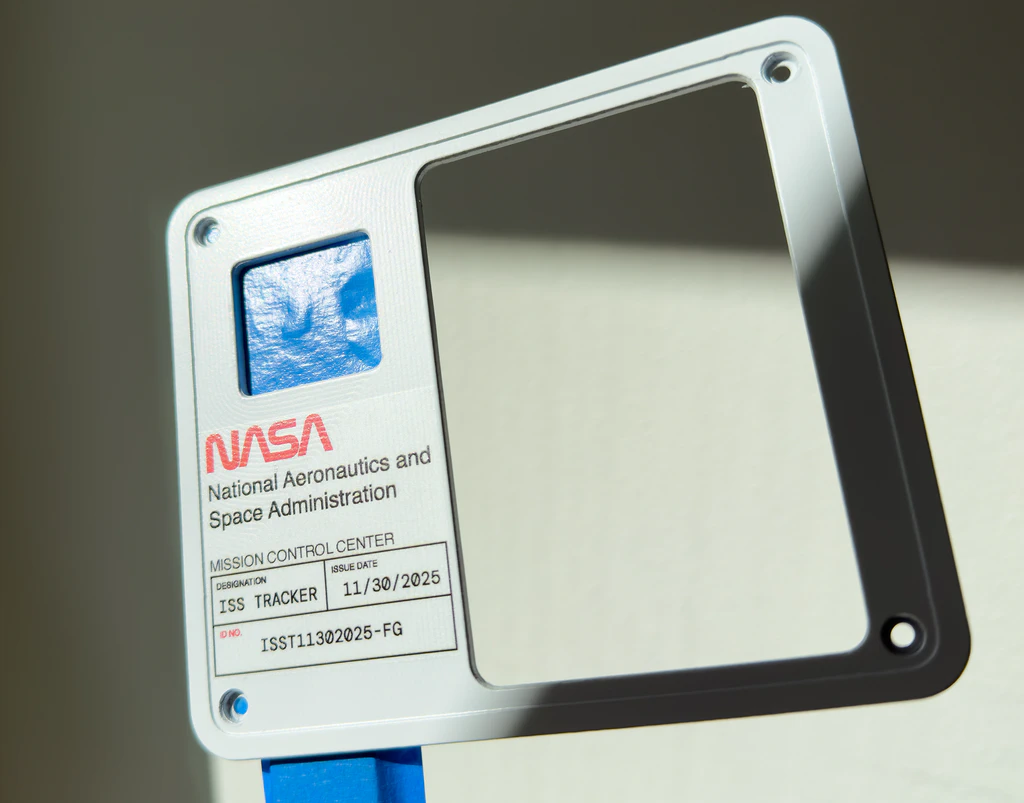
Decal
This project was always intended to look like a NASA module that would be installed in a control panel. To that end, I needed some NASA specific details. I designed a water slide decal in Illustrator that incorporated the iconic NASA worm font logo as well as some made up data to make it look “official”. Water slide decals are the best method I currently have for this type of decal but I’d love to try something like this with one of those new eufyMake UV printers. The annoying thing about the water slide decals is that you can see the full decal edge at most angles.
As is the common theme among most of my projects, I have no real world use for this data, but that’s hardly the point. It’s all about whimsy. Most of my projects are ideas born out of wanting to use up some spare parts or finding an interesting API. Below is a quick video of the device in action…