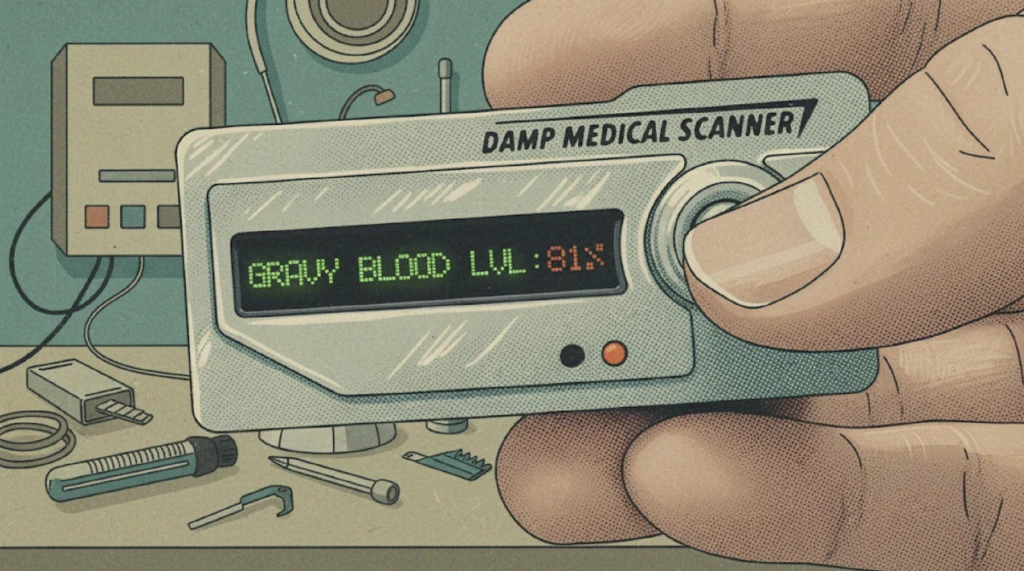
Let’s get this out of the way — what is “gravy blood”, and who is “Damp”?
This whole project started as an inside joke. My buddy and I would say we had gravy blood whenever we overindulged in a meal. That sluggish, heavy feeling afterward? In our lore, that’s the gravy blood kicking in.
Then one night we were watching Iron Man 2 and saw the Stark Medical Scanner. Perfect, we joked that we needed our own version to check our gravy blood levels.
As for Damp, that’s another story. The same friend went to pick up his food one day, and his receipt said “DAMP” instead of his actual name, Dan. We laughed about it for years, using “Damp Co.” as a kind of fictional company name for all our dumb ideas. Then, somehow, it stuck, and recently, Damp Co. actually became a real incorporated company. Life’s funny that way.
So, now you’re in on the joke. On to the build…
Official vs Mine 🔗
Here is a screen grab of the original prop as seen in Iron Man 2 vs the “finished” prop as built by yours truly with a hope and prayer: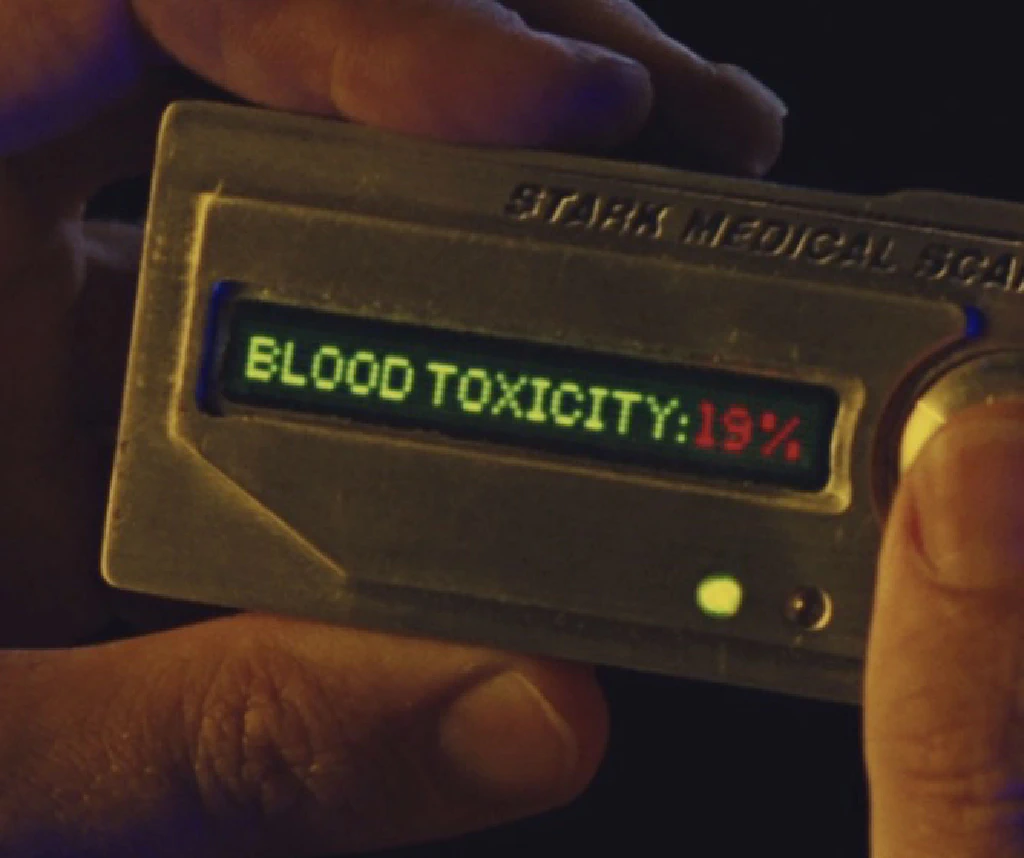
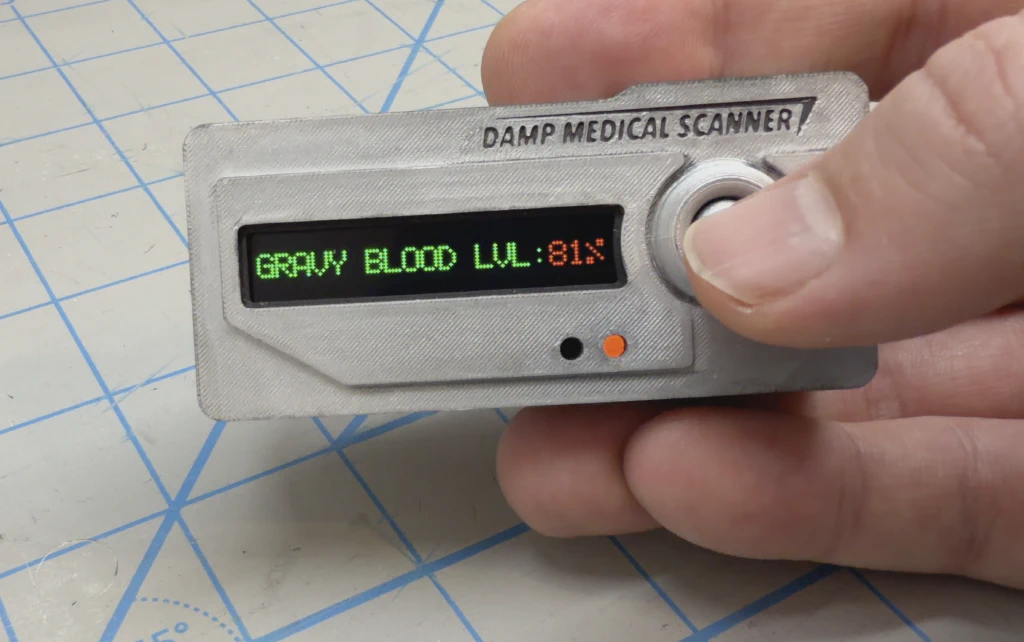
The Hardware 🔗
- Seeed Studio XIAO ESP32C6
- Waveshare 1.9” 170×320 ST7789 SPI TFT
- Random Temu piezoelectric buzzer and momantary swtich modules
Display Choice 🔗
Modern movies often rely on CGI for their device screens instead of practical displays, which makes it harder to replicate props exactly. I’m not sure if that was the case with the Stark Medical Scanner, but I couldn’t find a display that matched the dimensions or look closely enough for a faithful 1:1 build.
For this project, I ended up using a Waveshare 1.9-inch display. The tradeoff was that I didn’t have room for the two small status LEDs if I wanted to maintain proportions close to the original prop. My workaround was to use the LCD itself to light up those openings in the case — not perfect, but close enough for a joke prop.
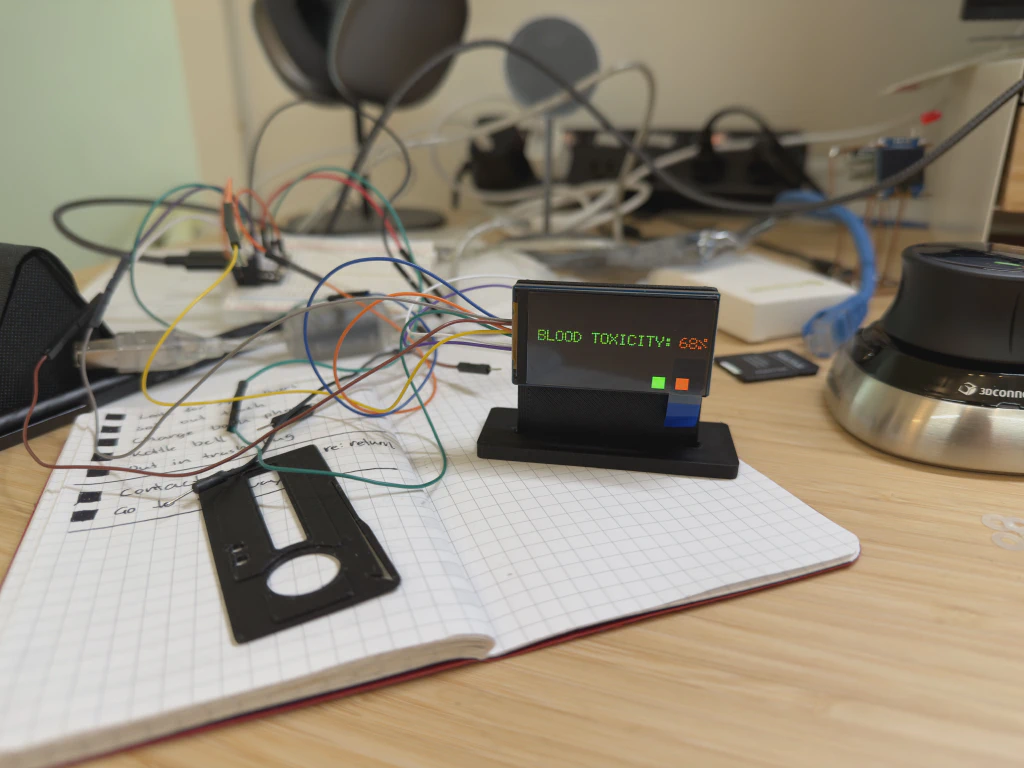
Early test of the display shown here on a temporary 3D-printed stand used for development and showcasing the screen-accurate graphics.
Electronics and Components 🔗
A couple of the components came from a Temu grab bag of random electronic modules and sensors I’d bought a while back, mostly to hit the free shipping minimum. As luck would have it, that “junk” bag included a piezoelectric buzzer and a momentary switch module, exactly what I needed.
The other key components are the ESP32-C6 microcontroller and a small rechargeable battery. The ESP handles the display, sound, and button logic, using nearly every GPIO pin available.
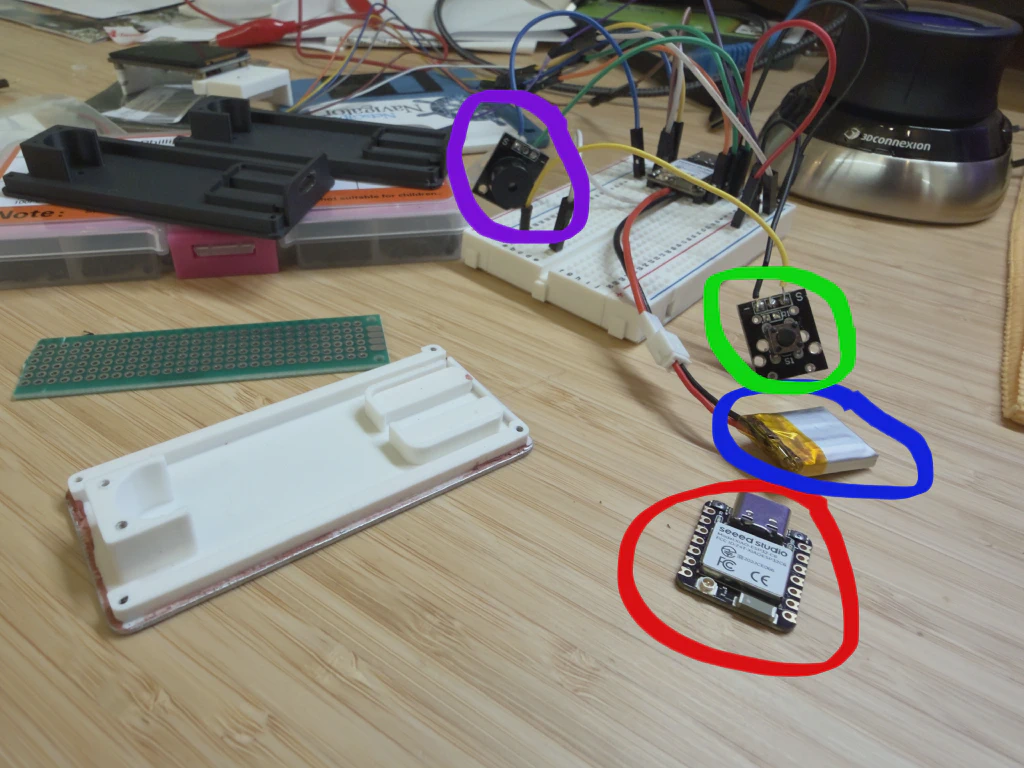
Purple: piezoelectric buzzer; Green: momentary switch module; Blue: lipo battery; Red: esp32c6
Modeling and Design Process 🔗
Working on small devices like this has its pros and cons. Printing smaller parts is quick, but fitting all the components inside such a tiny enclosure is a challenge. Fortunately, the recent trend of manufacturers providing accurate CAD models of their parts makes it much easier to plan everything in Fusion 360 before printing.
I wasn’t the first to recreate the Stark Medical Scanner, there are a few models online, but those aim for screen-accurate replicas. I needed to design my case around the specific display, which was the main constraint.
My process started with importing the 3D model of the Waveshare display into Fusion and also importing a screenshot of the movie prop and aligned the two so the openings on the face matched my screen as closely as possible. That defined the overall scale, and from there, I sketched out the rest of the body to match those proportions.
Internal Layout and Assembly 🔗
Since I had nearly all the components as 3D models, I was able to position them in the digital workspace and pack everything as tightly as possible. That layout determined the overall thickness of the case and the shape of the internal supports and mounting points. It’s not precisely engineered, more like sculpting in digital clay, just extruding shapes until there’s something solid to screw or glue parts to.
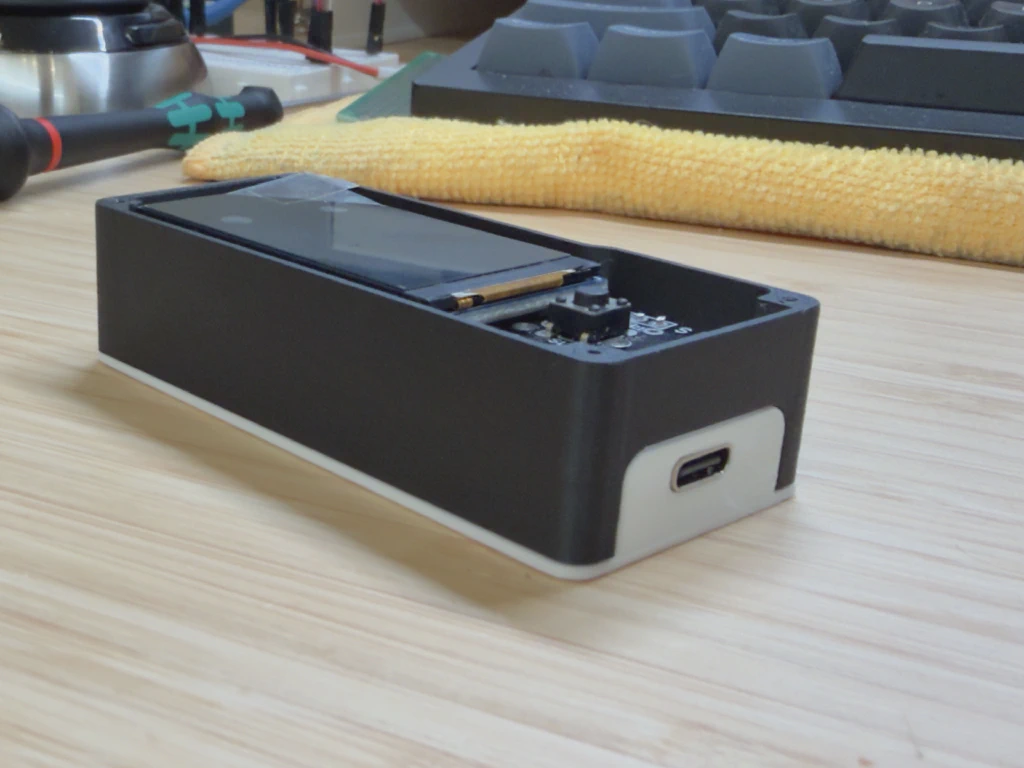
Device without the faceplate installed
Button Mechanism 🔗
The button on the front face is hinged at the bottom with a thin bridge of plastic, taking advantage of the material’s natural flexibility. Because it only needs a small amount of movement to press the switch underneath, there’s very little stress on that thin section. It’s a simple solution, but I’m confident it’ll hold up well over time.
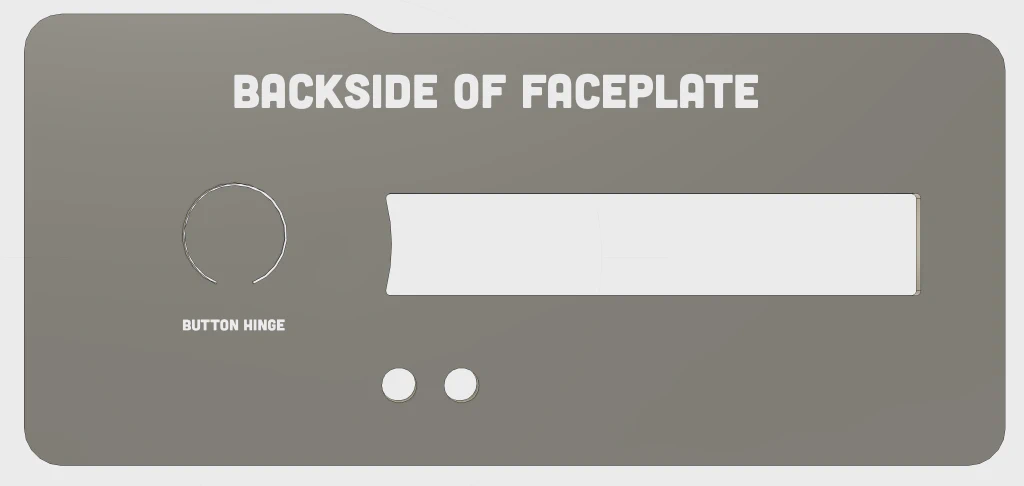
Tiny connecting bit of plastic to hinge on
Firmware 🔗
Below is the link to the firmware that powers the Medical Scanner prop. Running on a Seeed Studio XIAO ESP32-C6 and a 1.9″ ST7789 TFT display, it generates the dot-matrix style readout with beeps, blinking red percentages, and on-screen status indicators when the button is pressed. The readings are simulated for visual effect only, making it a fully self-contained display prop with no external sensors.
And its very easy to change the text to be screen accurate ;)
All the code is available on my GitHub.
Demo 🔗
A quick demo of me pressing the button to take multiple readings. In this video, I also show the “Three Color” mode I added just for fun. In this mode, readings of 80% or higher display in red, below 60% in green, and anything in between shows in yellow. Since the readings are random, it takes me a few tries to show all three colors.
holding down the button for three seconds switches between modes